

“Once you’re outdoors, you can’t rely on technology anymore,” says Christiaan Adams, developer advocate for Google Earth. Being able to read a good old-fashioned paper map is one of the most fundamental outdoor skills. In case you never learned or need a refresher, here are the basics.
(Want to learn how to take this knowledge to the next level, and take advantage of the full capabilities of 21st century mapping tools?)
Types of Maps
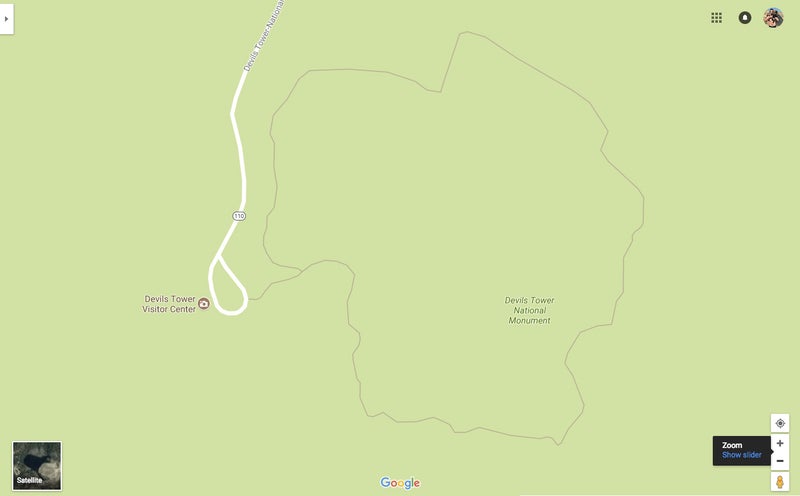
Google Maps can be considered a basic street map: an accurate two-dimensional portrayal of the world that includes the locations of roads, cities, parks, and other features. Maps like these do nothing to illustrate elevation.
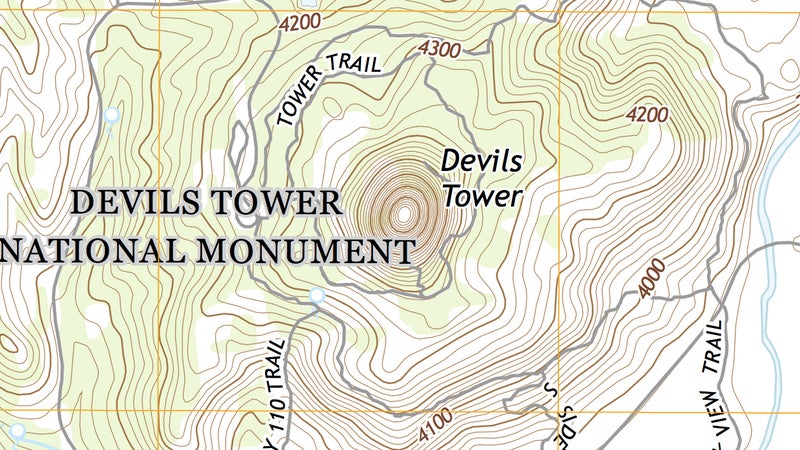
That’s where topographic (usually just “topo”) maps come in. These have lines at set elevation distances that trace the contours of the terrain. By representing topography, they allow you to see the three-dimensional world on a two-dimensional piece of paper. Topo maps are the only map you should use if you’re trying to navigate outdoors and will be the subject of most of this article.
There are also —think stylized theme-park maps—that may loosely represent the location of a trail and points of interest in relation to each other. Avoid these at all costs, as they lack the necessary topographic data that will allow you to find your way if lost.
You can find (USGS). They’re the gold standard and the basis of many other commercially available maps.
Understanding the Legend
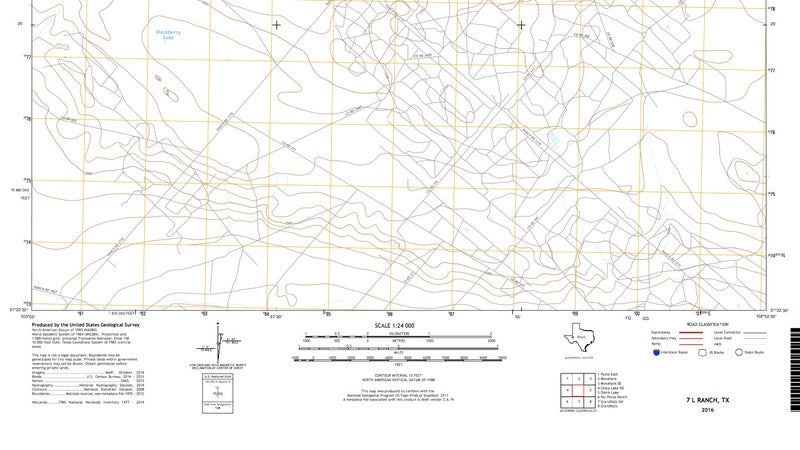
Any good map will tell you how to read itself. Take the above legend from . From left to right, it gives you information on where and when the map data was compiled, the area’s magnetic declination, the scale (note the contour interval below it), the location of the shown area in relation to the state it’s in (in this case, Texas), and a key to the symbols used to represent roads. Let’s look at what this information represents and how you can use it.
The source data isn’t typically all that relevant. It’s worth glancing at just to make sure it’s not insanely out of date, but as we can see here, much of the data used to assemble this map comes from 2008–2015, so it’s pretty recent.
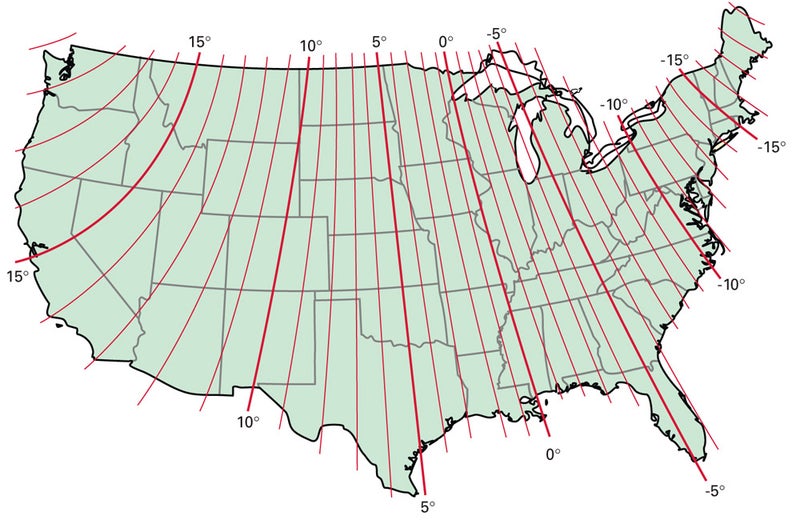
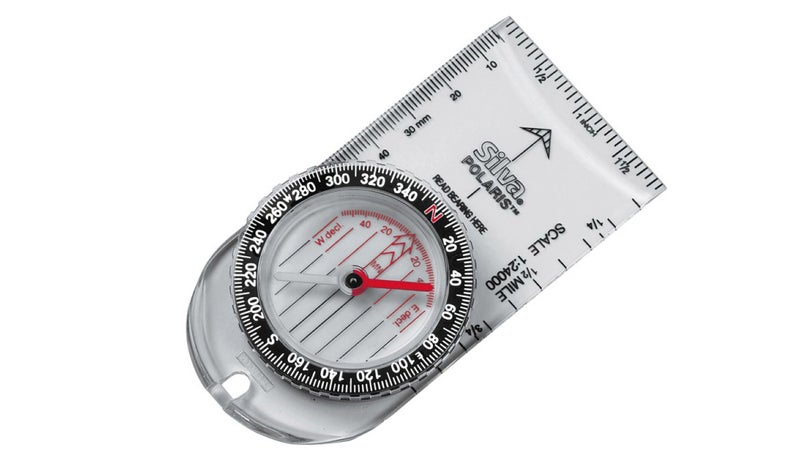
Magnetic declination is the difference between true north and magnetic north. A quality compass will allow you to alter the direction it points to suit the data provided by the map. Follow your compass instructions to do that. As you can see, there can be some pretty big differences between the two norths depending on where in the world you are.
The scale is how much the represented area has been shrunken down from the real world. For most topo maps, it’ll be 1:24,000. So, one inch on the map would be 24,000 inches in the real world. The ruler represents distance to make the scale easy to understand at a glance. Want to measure the distance of a winding trail? Use a piece of string to trace its route, mark its length, then compare the straightened string to that scale. Or do what I do: Use two fingers as a protractor to “walk” rough distances across the map.
The contour interval is the elevation distance between each of the contour lines, so you can scale the terrain being represented.
The map location is obvious. It allows you to easily look up the adjoining maps, should you need them.
The key is another essential, spelling out what the symbols on the map represent. Here, it’s types of road, but you’ll also find stuff like the lines that represent hiking trails, or train tracks, or watchtowers, or other essential stuff.
Take a minute to absorb the legend before trying to read the map itself. It’ll make the experience way easier and more informative.
How Contour Lines Represent the Real World
Here comes the tricky part. It may seem hard at first glance, but once you learn what contour lines represent, you’ll be able to look at them and picture real-life mountains, valleys, or whatever. And once you can do that, you can use a map to quickly and easily find your location and navigate.
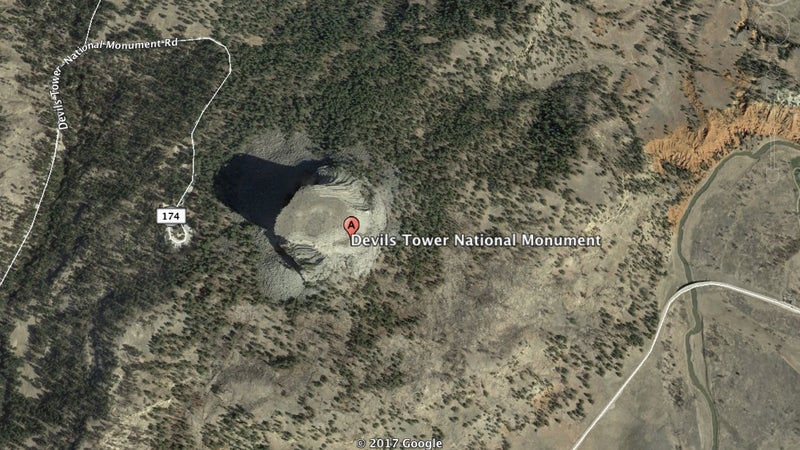
Adams, who also volunteers for the , rescuing lost and injured travelers across California, says he still uses Google Earth to gain an understanding of an area’s topography and terrain features before diving into a topo map and suggests that doing the same might be the best way for you to learn.
“I can do my map and compass work better and more effectively if I’ve seen the satellite imagery and the digital maps first,” says Adams.
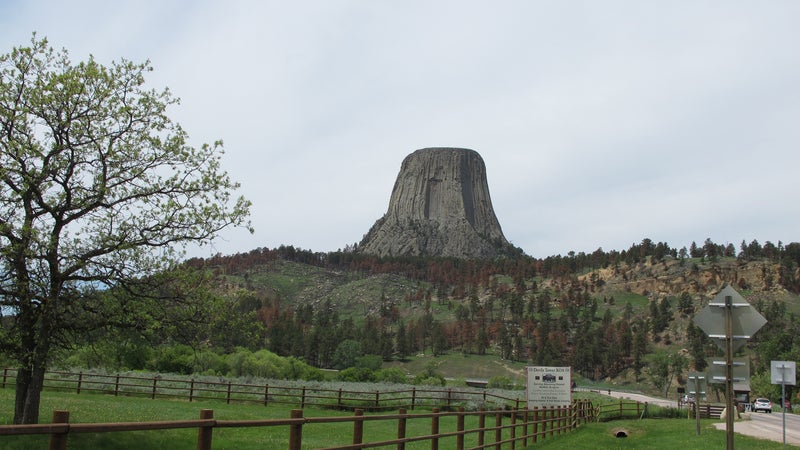
Let’s do just that, using as an example. Its distinctive shape should make seeing it represented with contour lines easy to understand.
Finding Your Location
Pick out two distinct terrain features that you can see both in the real world and on the map. A mountain peak, a prominent bend in a river, a saddle in a ridgeline, or something similarly unique.
Hold your compass level, point it (via its direction-of-travel arrow) at the first object, and twist the bezel so the big red arrow inside it aligns with the red north needle. Next, locate that object on your map, and rest a long edge of your compass on it, with north still inside the red bezel arrow. Rotate the map until its orienting lines align with those of the compass bezel. Trace a straight line through that object, using the edge of your compass as a ruler. You’re somewhere on that line. Do the same for the second object, and where that new line intersects the first one is your precise location. Get this right, and you’ve just found your location as accurately and quickly as you could with a GPS navigator.
Of course, you can do this calculation mentally once you gain some experience interpreting maps in the real world. “I’m right by that river bend,” or “We’re just under that ridge,” will simply become second nature.
Adams suggests that the easiest way to learn this skill is by first using Google Maps on your phone as a backup. Try to guess or calculate your location, then check it against the blue dot on your phone. He again cautions, however, against relying solely on that technology.
“When it comes down to it, digital maps are extremely useful,” Adams says. “But you still need to know how to get yourself out of trouble the old-fashioned way.”